12X24 Tile Patterns 1 3
12X24 Tile Patterns 1 3 - This pattern works well in both small and large spaces, creating a clean and minimalistic look. I've included a photo of how i think they're supposed to be installed. Large and small levels 3. I use this for all our porcelain tile. 25k views 2 years ago. However, for many of these, printed on the box of tile or stated on the order sheet by the distributor, it clearly states in one way or another, “brick joint pattern to be offset 33%.”.
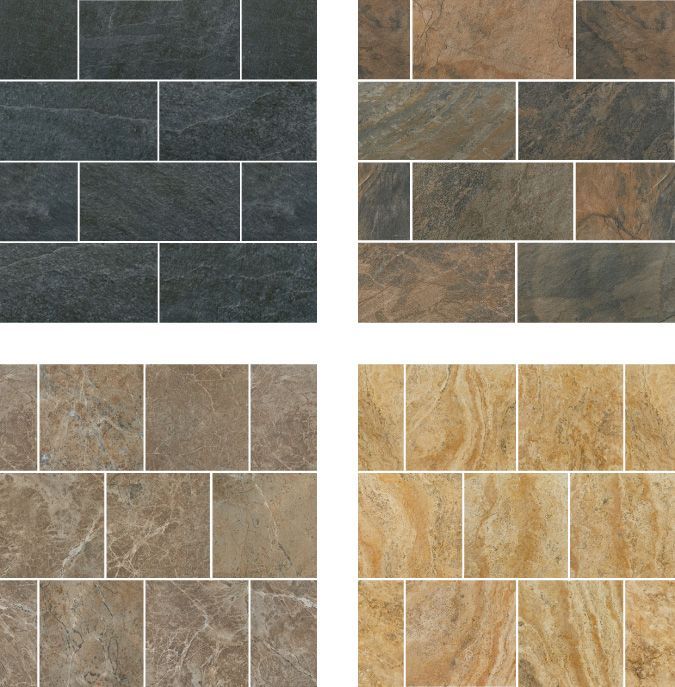
36% of 12x24, 18% of 12x12, 41% of 18x18 and 5% of 6x6; Today you will learn about different 12×24 tile patterns that you can implement in your own. However, for many of these, printed on the box of tile or stated on the order sheet by the distributor, it clearly states in one way or another, “brick joint pattern to be offset 33%.”. Web from 16 inch tile and larger, browse our extensive collection of stunning large format tile. Web smart homes 12×24 tile pattern layout march 2, 2021 2 minute read table of contents hide running bond/ brick pattern herringbone pattern basketweave pattern windmill pattern conclusion a tile of 12×24 in dimensions is a pretty colossal tile.
Large and small levels 3. This creates a more pleasant layout and makes the room look wider. Its direction is similar to a brick wall, where the longer side is across the surface. However, working with them may be a little different than what you are used to. Keep everything straight and level:
Tile pattern layout for 12x24 tiled

Today you will learn about different 12×24 tile patterns that you can implement in your own. Web one of the solutions that has been offered by experienced tile setters is not to lay the running bond at a 1/2 offset but rather the 1/3 offset. Great wet saw tile blade. This 88 sf bathroom floor got 12 x 24 in..
Custom tiled shower with 12x24 satiated tile run 1/3 staggered

This pattern works well in both small and large spaces, creating a clean and minimalistic look. I have to decide quickly. It involves installing the tiles in a simple grid pattern, with each tile aligned with the one next to it. Great wet saw tile blade. 25k views 2 years ago.
In Progress 12”x24”floor tile laid in 1/3 staggered pattern. Tile

I have to decide quickly. Web on numerous jobs, for both walls and floors, we are asked by interior designers to install 12 x 24 or similar tiles in a standard brick aka 50% offset pattern. Web large tile floor install 12x24 1/3 offset. Floor tile is 3 x 9 valentino gray tile using herring bone / chevron layout pattern..
Bestof You Best 12x24 Tile Patterns For Bathrooms In The World The

Web smart homes 12×24 tile pattern layout march 2, 2021 2 minute read table of contents hide running bond/ brick pattern herringbone pattern basketweave pattern windmill pattern conclusion a tile of 12×24 in dimensions is a pretty colossal tile. Web 52 12 x 24 100 the tile pattern charts show the number of tiles needed for 100 square feet. They.
Kitchen Floor Tile Patterns 12x24 Flooring Images

Web a horizontal orientation with a 1/3 offset tile floor is best for rectangular tiles. Web 52 12 x 24 100 the tile pattern charts show the number of tiles needed for 100 square feet. Web large tile floor install 12x24 1/3 offset. I've included a photo of how i think they're supposed to be installed. Keep everything straight and.
12x24 tile installed on a 1/3 offset pattern installed over ditra xl

Web tile pattern layout for 12x24 tiled dancingdeer 9 years ago my tiler is starting to lay my tile in a 70/30 split. Large and small levels 3. This creates a more pleasant layout and makes the room look wider. Web a combination of four sizes (two patterns): Web large tile floor install 12x24 1/3 offset.
12 X 24 Tiles In A Herringbone Pattern On The Kitchen Floor Herringbone

Web this project shows a new construction guest bathroom with 12 x 24 valentino gray tile using offset subway layout pattern for the tub surround and vanity wall from floor to ceiling (9 ft.). I actually may like picture #1 above better which he didn’t offer me. Web 52 12 x 24 100 the tile pattern charts show the number.
12x24 tile 1/3 offset Google Search Patterned floor tiles, Floor
Web 377 share 46k views 2 years ago when installing 12x24 porcelain tile most manufacturers do not recommend installing them 1/2 brick offset. This project shows a remodeled master bathroom with 12 x 24 tile on a vertical offset pattern used on the walls and floors. 36% of 12x24, 18% of 12x12, 41% of 18x18 and 5% of 6x6; Get.
12x24 Tile Laid Straight Floor tile patterns layout, Floor tiles

Shouldn't the tiles be in a continual stagger pattern, as opposed to lining up in every other row? However, for many of these, printed on the box of tile or stated on the order sheet by the distributor, it clearly states in one way or another, “brick joint pattern to be offset 33%.”. Tile is installed over ditra xl with.
1 3 Staggered Tile Pattern Mary Blog

He laid it out dry for me to look at. 36% of 12x24, 18% of 12x12, 41% of 18x18 and 5% of 6x6; Keep everything straight and level: This creates a more pleasant layout and makes the room look wider. Web a horizontal orientation with a 1/3 offset tile floor is best for rectangular tiles.
12X24 Tile Patterns 1 3 - I have to decide quickly. Web 52 12 x 24 100 the tile pattern charts show the number of tiles needed for 100 square feet. Web one of the solutions that has been offered by experienced tile setters is not to lay the running bond at a 1/2 offset but rather the 1/3 offset. So one of the options you have if you don’t want the. I've included a photo of how i think they're supposed to be installed. However, for many of these, printed on the box of tile or stated on the order sheet by the distributor, it clearly states in one way or another, “brick joint pattern to be offset 33%.”. He laid it out dry for me to look at. Web 377 share 46k views 2 years ago when installing 12x24 porcelain tile most manufacturers do not recommend installing them 1/2 brick offset. Web here is an explainer on 1/3 staggered tile pattern plus 4 other basic patterns. They are durable, and because of their size, fewer are needed per space, meaning fewer grout lines making cleanup and maintenance a breeze.
I've included a photo of how i think they're supposed to be installed. Web the straight lay pattern is the most common and straightforward layout for 12 x 24 floor tiles. Web on numerous jobs, for both walls and floors, we are asked by interior designers to install 12 x 24 or similar tiles in a standard brick aka 50% offset pattern. Web this project shows a new construction guest bathroom with 12 x 24 valentino gray tile using offset subway layout pattern for the tub surround and vanity wall from floor to ceiling (9 ft.). Web large tile floor install 12x24 1/3 offset.
I actually may like picture #1 above better which he didn’t offer me. This creates a more pleasant layout and makes the room look wider. Each additional row of tiles is offset by 1/3 of the. When it comes to regular square or rectangular tiles, nearly every pattern can be boiled down to these five basic models.
I've included a photo of how i think they're supposed to be installed. They are durable, and because of their size, fewer are needed per space, meaning fewer grout lines making cleanup and maintenance a breeze. Do you think the pattern looks like picture #2 above?
This post is going to cover some basics on: Floor tile is 3 x 9 valentino gray tile using herring bone / chevron layout pattern. However, working with them may be a little different than what you are used to.
25K Views 2 Years Ago.
Floor tile is 3 x 9 valentino gray tile using herring bone / chevron layout pattern. I've included a photo of how i think they're supposed to be installed. Web smart homes 12×24 tile pattern layout march 2, 2021 2 minute read table of contents hide running bond/ brick pattern herringbone pattern basketweave pattern windmill pattern conclusion a tile of 12×24 in dimensions is a pretty colossal tile. Another is to widen grout joints, which can be difficult to convince a cutomer to do particulary these days when everyone wants no grout joint if possible.
Laid Out Two Directions And Asked My Preference.
This pattern works well in both small and large spaces, creating a clean and minimalistic look. Porcelain tile installed in a third/3rd pattern/design. He laid it out dry for me to look at. This project shows a remodeled master bathroom with 12 x 24 tile on a vertical offset pattern used on the walls and floors.
Great Wet Saw Tile Blade.
Web one of the solutions that has been offered by experienced tile setters is not to lay the running bond at a 1/2 offset but rather the 1/3 offset. Keep everything straight and level: I actually may like picture #1 above better which he didn’t offer me. Get the job done right using proper hand tools:
I Have To Decide Quickly.
It involves installing the tiles in a simple grid pattern, with each tile aligned with the one next to it. I began the 1/3 offset install starting from left to right. However, working with them may be a little different than what you are used to. This post is going to cover some basics on: